Say the words “California native plants” to a fellow gardener and sometimes the response is, “No, thanks. I’m not into the cactus look.” Many people are unaware that here in Northern California, there are no native cacti!
What we have instead are two genera of lovely native succulents: Dudleya (liveforever) and Sedum (stonecrop). Dudleyas are called liveforevers because they can live a long time even under adverse conditions due to the moisture they store in their fleshy leaves and succulent stems. In the wild, dudleyas grow on well-draining soils of coastal bluffs and in the cracks of boulders, usually facing sideways or at an angle.
At home, they do best in mounding rock gardens or pots. I find pots easier to manage and control. Part shade or north facing exposures or morning sun are best. Be vigilant against snails and slugs who love to munch on dudleyas. Enjoy the flowers in spring and be delighted by the hummingbirds drawn to the nectar. Expect some drying up in summer, but as soon as the rains return, the dudleyas puff up again.
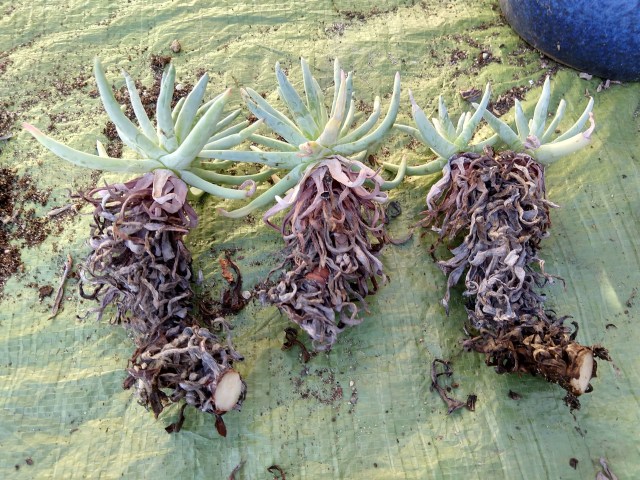
After a few years, each plant develops an elongated, branched stem. The succulent foliage is at the top of each stem, but below it are dried up leaves of seasons past. The plant is now ready for rejuvenation, repotting, and vegetative propagation.
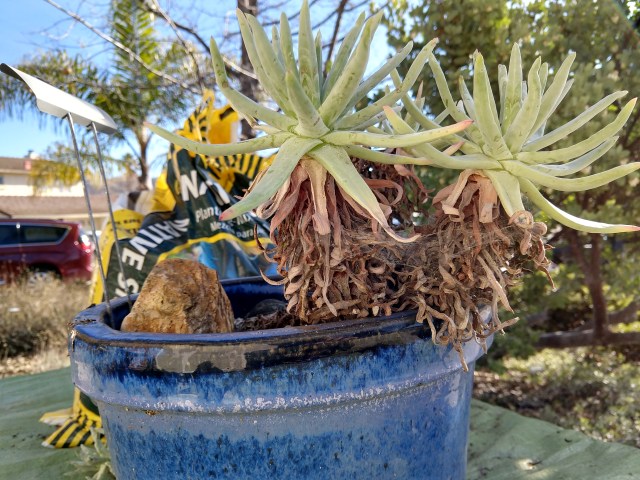
If your dudleya looks like this after a few years, it is ready for repotting.
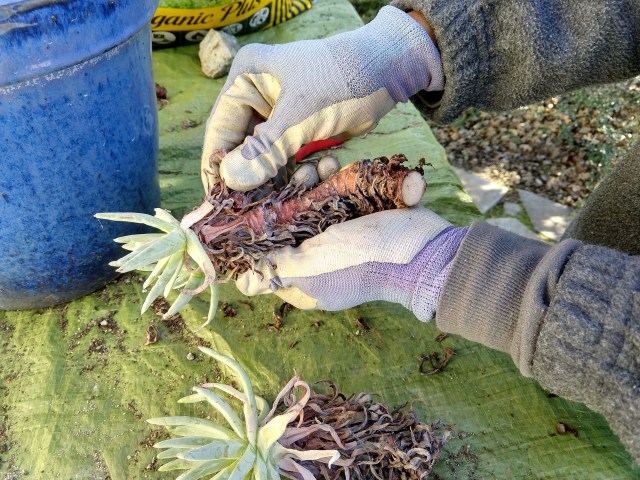
With a clean pruner, just snip the stem at the base of the plant, like this:
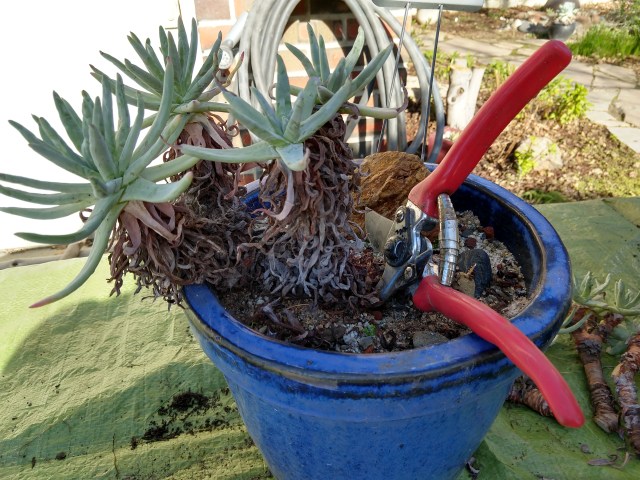
Now you have the entire plant, stems and all, like this:
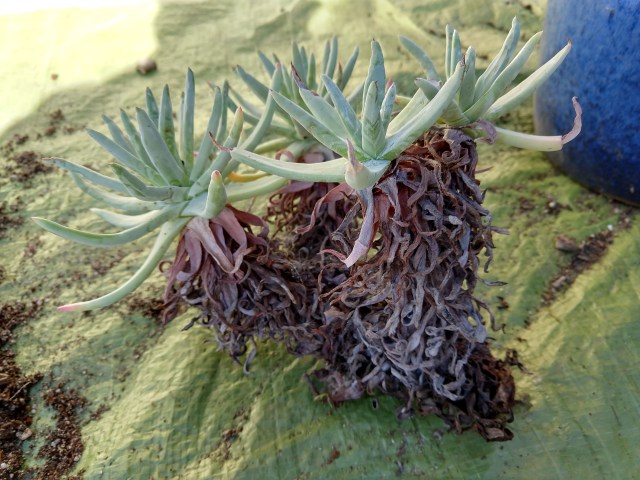
Separate the stems from each other using the pruner, like this:
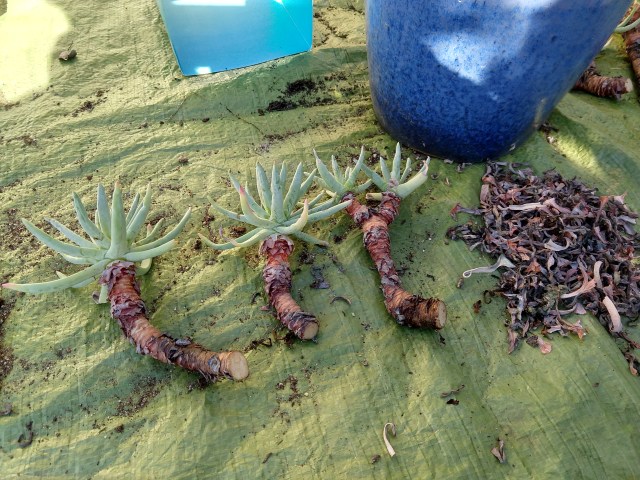
Now comes the fun part. Gently rub off the dry leaves using your thumb and forefinger, like this. If the leaves are truly dry, they will crumble as they come off. In some species of dudleya, the dry leaves are tenacious, and may have to be gently torn/teased off the stem. Take care not to damage the succulent leaves at the top of the stem.
Do this for all stems. When you are done, you should have several cuttings, each topped by fleshy foliage, with a smooth, bare stem below, like this:
To start repotting, you will need a potting mix. [Revised 2023-01-16] Store bought cactus mix is too rich. Make your own. Paul Heiple, the chapter’s dudleya propagation guru, uses the following recipe for dudleyas:
4 parts coarse/sharp sand (“120-sieved”)
2 parts compost or potting soil (avoid peat moss!)
1 part 1/4″ chips of decomposed granite
Mix it all in a bucket and keep it ready. Moisten it with some water just before use. Now you are ready to repot.
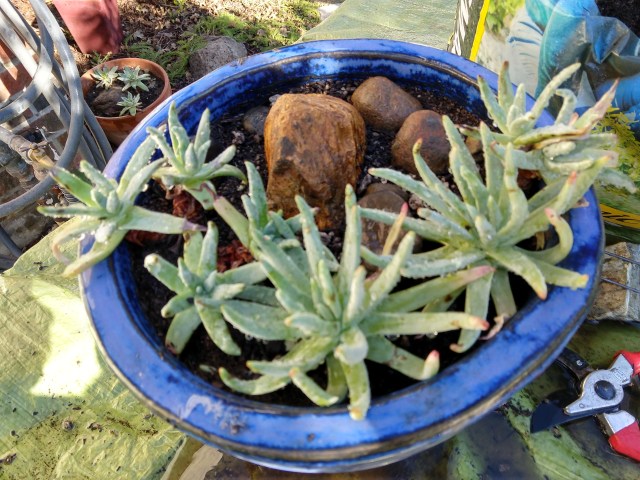
Half-fill the pot with the potting mix, set a large stone off-center, arrange the dudleya stems around it, and fill in the pot. Shake the pot gently from side to side to allow the mix to settle and fill in any air pockets. Water gently but thoroughly.
Water weekly through the dry months. Enjoy!
If you have extra stems, plant in 4″ pots and share with neighbors and friends.

That’s all there is to it. Place in bright shade, and enjoy the plants for another 4-5 years. Bon jardinage!
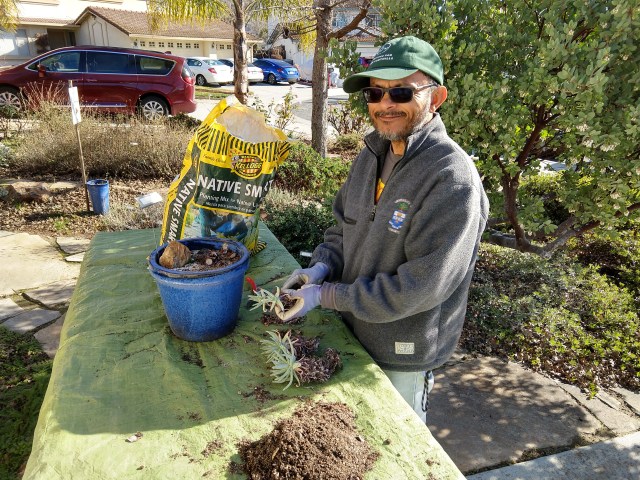

Hello, my Santa Catalina dudleya is throwing up soft stems with tiny rosettes at the tip. Do you think those could be trimmed off, dried, and rooted? I’m too impatient to let my one-year-old plant establish a woody trunk before taking an insurance cutting. Thank you. (I’m intrigued by the planting mix behind you on the table. I’ve never seen that but will try to seek it out.)
LikeLike
I don’t think you can propagate Dudleya from soft tissue like that. It is the main stem that is capable of growing new roots (where the nodes are, where older leaves used to attach). The soil mix is available at Home Depot: https://www.kellogggarden.com/products/kellogg/kellogg-garden-organics-native-smart/
LikeLike
Thank you soooo much for the informational pictures and article. This was very helpful!
LikeLike
You are welcome. Dudleyas are easy for brown thumb gardeners like me. Hummingbirds like the flowers!
LikeLike
what chapter in which book,please is possible help me thanks
LikeLike